Deploy ASP NET Core application on Docker Linux container from Windows
Few weeks ago we saw how we could run ASP NET Core application on Ubuntu. This proving that a .NET Core Application can run on a Linux system, today we will be taking it a step further and see how we can deploy our application in a Docker Linux container. This post will be composed by three parts:
- Install Docker on Windows
- Docker basic commands
- Create ASP NET Core application
1. Install Docker on Windows
The first step is to go to the official site, sign up and download Docker CE.
Once downloaded, install Docker.
After being installed you should be able to right click on the icon > Settings on the Docker notification icon and see that Docker is running by checking the status at the bottom left, it should say Docker is running.
Open PowerShell and type docker run hello-world.
$ docker run hello-world Unable to find image 'hello-world:latest' locally latest: Pulling from library/hello-world d1725b59e92d: Pull complete Digest: sha256:0add3ace90ecb4adbf7777e9aacf18357296e799f81cabc9fde470971e499788 Status: Downloaded newer image for hello-world:latest Hello from Docker! You just downloaded the hello-world image and ran it in a container which printed Hello from Docker which was redirected to the console.
Useful link to the Docker orientation https://docs.docker.com/get-started/#prepare-your-docker-environment
Fix Docker not starting:
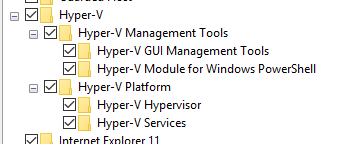
- Check that Hypervisor is enabled by opening the
Windows Featuresand check if every checkbox is selected underHyper-V.
- Next Under Hyper-V Manager check that
MobyLinuxVMis inRunningstate.
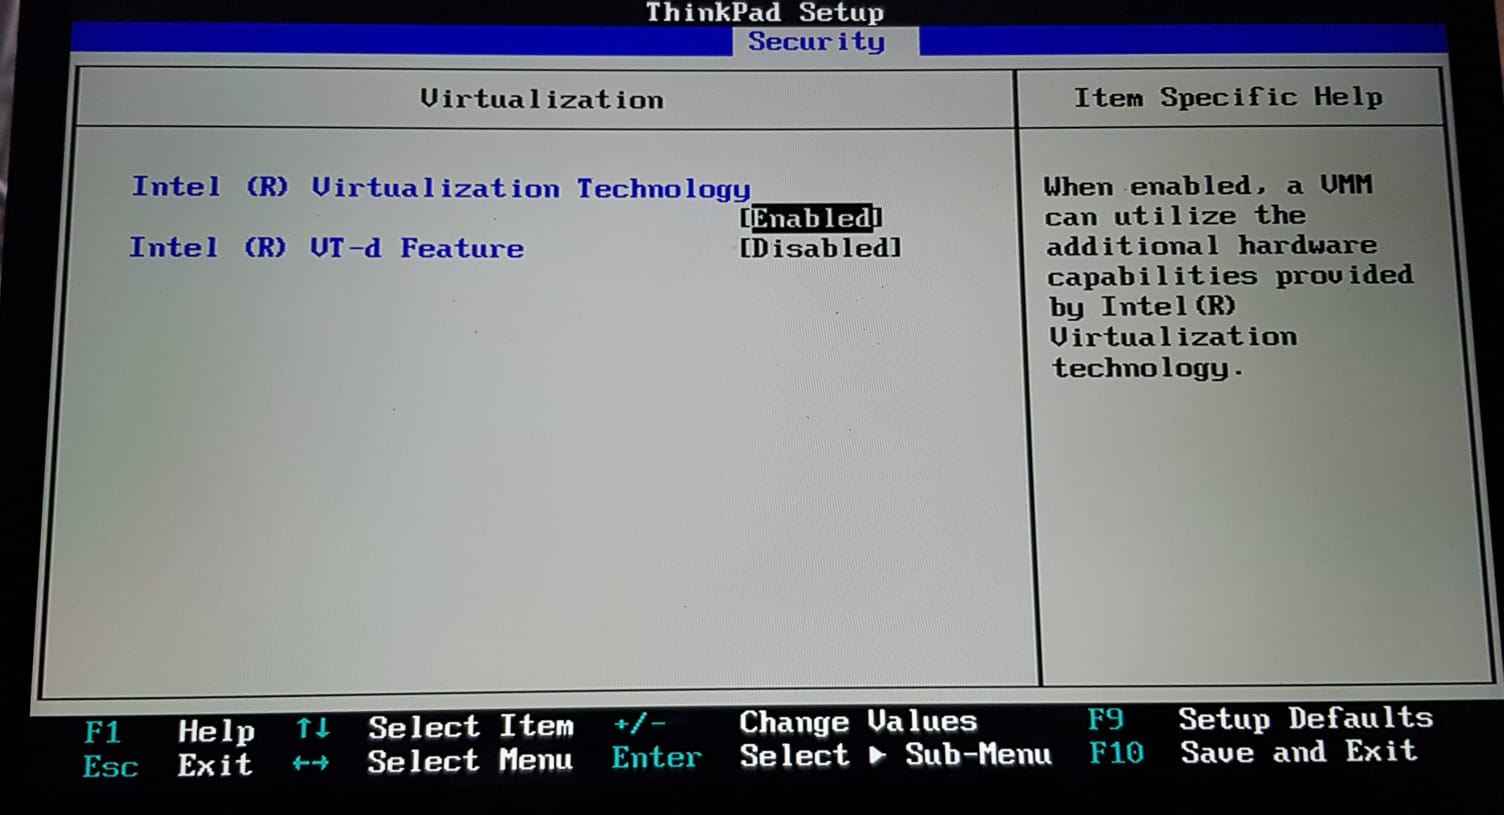
- If it isn't running, Docker fails to start, virtualization might not be enable on your computer and you will have to enable it on BIOS.

2. Docker basic commands
Now that Docker is installed and we can start build images and running containers, we can look into some of the terminology and commands from the CLI.
An image is a set of layers describe by the Dockerfile. It represents a state of an environment. It is built with docker build. There can be multiple version of the image tagged to different versions. A container is a running instance of an image bootup using docker run. Multiple containers can be started from the same image.
To manage image and containers, we can use the commnad docker image ... and docker container ....
For example to list all the containers running:
docker container ls Or to see all images:
docker image ls A container can be seen as a running process, it can be stopped using the following command:
docker container stop [container-id] Or killed:
docker container kill [container-id] Rogue images and containers can be cleared with prune:
docker image/container prune Images and containers can be removed using rm with
docker image/container rm [image or container id] Standard output are redirected and can be viewed using:
docker container logs [container-id] Lastly if we want to inspect the content of the container, we can get access to a bash interactive shell by executing the following:
$ docker container ls CONTAINER ID IMAGE COMMAND CREATED STATUS PORTS NAMES a7ab376d75ab dockertest:dev "dotnet DockerWebApp…" 32 seconds ago Up 30 seconds 0.0.0.0:5000->80/tcp cocky_montalcini $ docker container exec -it a7ab376d75ab bash root@a7ab376d75ab:/app# exec is used to execute a command on a running container, here we open an interactive shell with -it and execute bash. To exit, type exit.
root@a7ab376d75ab:/# exit exit kimserey.lam@KLAM C:\Projects Now that we have Docker installed, and know some functionalities of the docker CLI, let's see how we can setup an ASP NET Core application running in Docker Linux container.
3. Create ASP NET Core application
In order to get an ASP NET Core application running on Docker, we need to create a Dockerfile which is a file containing instruction on how to build a Docker image of our application.
3.1 Dockerfile
Start by creating an empty ASP NET Core application. Then right click on the project and select Add Docker support.
Once added, the toolbox will have created the following Dockerfile in your project:
FROM microsoft/dotnet:2.1-aspnetcore-runtime AS base WORKDIR /app EXPOSE 80 FROM microsoft/dotnet:2.1-sdk AS build WORKDIR /src COPY DockerWebApp/DockerWebApp.csproj DockerWebApp/ RUN dotnet restore DockerWebApp/DockerWebApp.csproj COPY . . WORKDIR /src/DockerWebApp RUN dotnet build DockerWebApp.csproj -c Release -o /app FROM build AS publish RUN dotnet publish DockerWebApp.csproj -c Release -o /app FROM base AS final WORKDIR /app COPY --from=publish /app . ENTRYPOINT ["dotnet", "DockerWebApp.dll"] The Dockerfile contains multiple step, FROM specifies the image from you will start, WORKDIR specifies the current dictory within the container. COPY is used to copy files and RUN is used to run processes. At the end of the script we defines the ENTRYPOINT as being the dotnet process with the dll as argument just like we would run dotnet DockerWebApp.dll in our command prompt.
One we have the Dockerfile, we can build by running the following in the root of the application:
docker build -f DockerWebApp\Dockerfile -t dockertest:dev .\ docker build builds the image, -f specifies the dockerfile paht while -t represents the name of the repository and the tag of the application. We can see the image built with docker image ls.
$ docker image ls REPOSITORY TAG IMAGE ID CREATED SIZE dockertest dev 6663b809a99a 4 seconds ago 255MB microsoft/dotnet 2.1-aspnetcore-runtime 40d759655ea3 7 days ago 255MB microsoft/dotnet 2.1-runtime cc240a7fd027 7 days ago 180MB microsoft/dotnet 2.1-sdk e1a56dca783e 7 days ago 1.73GB docker4w/nsenter-dockerd latest cae870735e91 11 months ago 187kB Once built we can run this image by mapping the port of the container to 5000 on the local machine.
docker run -p 5000:80 dockertest:dev If we look at the list of containers, we will see our container runnning and the PORTS specifies that the local machine redirects traffic from 5000 to 80 in the container.
docker container ls CONTAINER ID IMAGE COMMAND CREATED STATUS PORTS NAMES a7ab376d75ab dockertest:dev "dotnet DockerWebApp…" 32 seconds ago Up 30 seconds 0.0.0.0:5000->80/tcp cocky_montalcini Navigate to http://localhost:5000 and you will be able to hit your application running in Docker container.
$ docker container logs -f a7ab376d75ab Hosting environment: Production Content root path: /app Now listening on: http://[::]:80 Application started. Press Ctrl+C to shut down. info: Microsoft.AspNetCore.Hosting.Internal.WebHost[1] Request starting HTTP/1.1 GET http://localhost:5000/ Now we can build images and run ASP NET Core application containers but we lost are ability to use the Visual Studio debugger because it's no longer a process that can be easily attached with a debugger.
To fix that Visual Studio and Docker tools provide an extension which gives full integration of the debugger via docker-compose and dcproj.
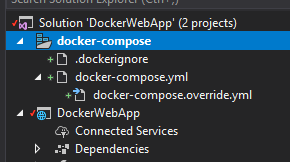
When we enabled Docker support, a dcproj was created and saved under the solution. The project contains a docker-compose.yml and an override which are used to orchestrate deployment.
version: '3.4' services: dockerwebapp: image: myregistry/dockerwebapp build: context: . dockerfile: DockerWebApp/Dockerfile Here we only have one service dockerwebapp and under the override file:
version: '3.4' services: dockerwebapp: environment: - ASPNETCORE_ENVIRONMENT=Development ports: - "5000:80" We map the local port 5000 to the container 80 which serves our ASP NET Core application.
Everytime we make changes to this file, we can see the Docker Output on Visual studio:
version: '3.4' docker ps --filter "status=running" --filter "name=dockercompose5923735658168190169_dockerwebapp_" --format {{.ID}} -n 1 docker-compose -f "C:\Projects\DockerWebApp\docker-compose.yml" -f "C:\Projects\DockerWebApp\docker-compose.override.yml" -f "C:\Projects\DockerWebApp\obj\Docker\docker-compose.vs.debug.g.yml" -p dockercompose5923735658168190169 --no-ansi build Building dockerwebapp Step 1/3 : FROM microsoft/dotnet:2.1-aspnetcore-runtime AS base ---> 40d759655ea3 Step 2/3 : WORKDIR /app ---> Using cache ---> 058625e3a437 Step 3/3 : EXPOSE 80 ---> Using cache ---> e220acc00b8b Successfully built e220acc00b8b Successfully tagged myregistry/dockerwebapp:dev docker-compose -f "C:\Projects\DockerWebApp\docker-compose.yml" -f "C:\Projects\DockerWebApp\docker-compose.override.yml" -f "C:\Projects\DockerWebApp\obj\Docker\docker-compose.vs.debug.g.yml" -p dockercompose5923735658168190169 --no-ansi up -d --no-build --force-recreate --remove-orphans Recreating dockercompose5923735658168190169_dockerwebapp_1 ... Recreating dockercompose5923735658168190169_dockerwebapp_1 ... done Done! Docker containers are ready. This means that everytme we change the file, the image is updated. For development, the container is already running so there's no need to manually run it. All we have to do is to select the docker project from Visual Studio and set it as a startup project, run it, we will now be able to breakpoint in the project.
And that concludes today post! We now have an ASP NET Core application deployed on Docker Linux container which can be debugged locally via breakpoint.
Conclusion
Today we saw how we could install Docker Linux containers on Windows, we discovered some of the most common features of the Docker CLI to manage images and containers and lastly we saw a concrete example of how to setup an ASP NET Core application running in Docker Linux container and how we could breakpoint to debug code while running in the container. Hope you like this post, see you next time!


No comments:
Post a Comment